Sunday, March 4, 2012

Learning 3D stuffs, part three: The showstoppers

Part one
Part two

In this part, which should sum up where I'm standing now, I think it's best to simply answer to some quotes from people trying to help directly or indirectly. This is not to say you're not helpful, quite the opposite! It's only to illustrate where I have the real problems and that the small things many take as given can be horribly frustrating for a newbie.

A while ago I asked Jester for some advice, after he already reinstalled everything NWN2 just to fulfill a model request for me. He's incredibly helpful, but... the thing is that his tips on a workflow mean absolutely nothing to a complete noob, and it actually ended with me thinking "I must come over as completely retarded" and being too shy to ask any further questions. At that point I decided that trying to learn this is a complete waste of time and I'd never make any progress, so I stopped trying until now.

Anyway, I'll just copy/paste some parts of the workflow and comment as good as I can:

Jester said:

"NNWC workflow:

The NNWC bases were done with Blender and Daz Studio and the Rachel base. I imported a simple female mesh into Blender and exported it as an object. Also did this with some gloves and boots. I then imported the objects into Daz. I then set up a Rachel figure to have the same size and pose as the female meshs from NWN2. You can set meshes to be partially transparent in Daz which made this easier."

This part is quite clear, the main problem probably being that I don't use DAZ at the moment and need other means to pose. If it was just the body, I could probably get rid of Make Human and use DAZ instead, but this won't help with the .nifs or whatever else I export. Anyway, no problem understanding this part. 

"Once the Rachel mesh was as close as I could make it to the NWN2 meshs (this took a while) I exported it as an obj and imported it into Blender. I now had a high poly base for the NNWC mesh."

Quite clear too, although I had problems with the object export the one time I tried. Could it be that it affects quality? In any case, the idea is clear. Going on.


"I then created the NNWC mesh using Blender's retopo tools and shrink wrap modifier." 


Fill in a Homer Simpson face here. I.. have... no... idea. Not what these are, not where to find them. This short sentence makes me cry. 

"Once this was done I had to rig it to the P_HHF_skel by painting on vertex weights. This took a while too..."


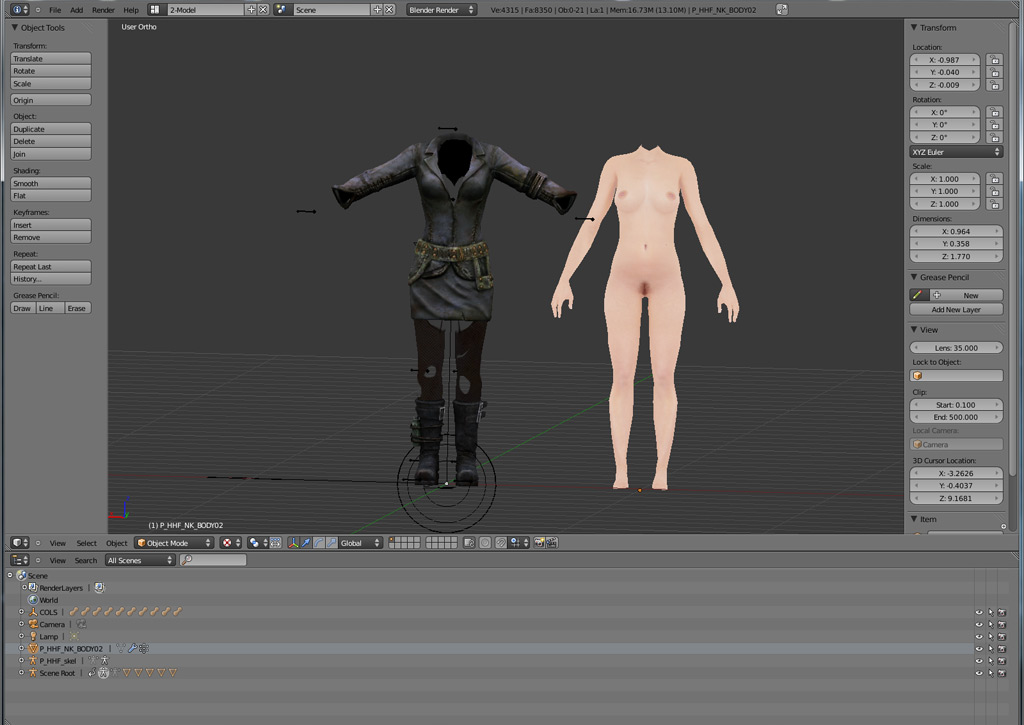
Ahh... my favorite topic. Vertex weights or lolwut? Okay, seriously... I have a basic understanding on what they are - they handle how much the mesh is affected by bone movement... so if you move the right arm bone upwards, the mesh of that right arm should move nicely along while the left foot doesn't move at all. This is what I understand. Now... when I switch Blender to vertex paint I get this:


Yup. So... I can paint a question mark there and that's all that comes to my mind in this mode. I understand that in theory I should tell the body mesh how much the movement of a specific bone affects it. But HOW I do that here, I have no idea. Or... how could I see existing weights? I mean, this mesh is already rigged to the skeleton below and moves with it (this is the Jester model), shouldn't that mesh already be colored like a rainbow? Where do I choose which bone I want to paint weights for? Or am I just in the wrong mode and should switch to Weight Paint...


Which is exactly the same problem in blue? I'm sorry, but this is where I'm totally lost and think I'm too dumb.

"Then I marked seams on the mesh and unrolled it to get the UV map."

Got the idea of it, I guess it takes some trial and error but I understand why and how (might have to google the exact steps again, but anyway).

"Edited it to make the best use of the texture space."

Now how to do that is a different topic, no idea how to edit that UV map... inside Blender? Can you move stuff around on the map and the model later still knows what you did? I'm far from those steps yet, so we'll see.

"The baked the diffuse texture, ambient occulusion and normal map from the high poly model to the low poly model. This captured all the muscles and features in the high poly model."

This would probably a whole new chapter of the walkthrough I need. I get the idea of using a high-res normal map to make a low-poly model appear smoother, but how...

"Saved the textures, combined the diffuse and AO in GIMP, saved as .dds."

Not sure about the whole AO map and combining it with the diffuse, but I guess that's a topic for much later. Saving something as dds, that much I learned already! Yay. 

"Reduce the alpha value of the normalmap in GIMP, blurred and smeared out any baking artifacts. saved as .dds"

Same as above, not sure about the alpha value thing, rest makes sense. 

"Set up the material in Blender, deleted all unnecessary meshes (the high poly ones), checked it all looked OK."

I just have to mention what a major pain in the rump the setting up of textures in Blender is. I only get that done accidently, never exactly knowing what I do.

"Exported to mdb. Done..."

Well, I tried that before, just for the laughs... 


... but then found out it's probably because I deleted everything that isn't the mesh, like the collisions (no idea what to do, how to deal with collisions)


"NIF usage:
To use .nif meshes the big chunk of work will be reskinning - the
skeleton used in NWN2 is different to the Fallout 3 one. There is a
script in Blender 2.49 that interpolates weights from one mesh to
another, but this doesn't work in 2.56. I mean to update this as well
because it's very useful."

I think this is the Bone Weight Copy script I mentioned before and already installed in a version that works in 2.6. How exactly to use it is another question. I assume I should put the two meshes (say, a body and a shirt) as close to each other as possible )like the body wears it), then select both, then run the script, and it should translate. However, same as above with the manual painting: How do I actually check if it worked, where can I SEE the weights, where can I make my adjustments? That's the part that is too much for me, and I bet a model that doesn't fit the other mesh as nicely as a catsuit will need a lot of adjustments.
The most helpful thing I could google for that is this TES tutorial. Sadly it's not explaining most of my questions and is also for Blender 2.49 which is essentially a totally different programm....

"LO1/LO2 meshes:
These are lower poly meshes that are provided in the NWN2 .mdbs. They are meant to provide lower poly models to be used if the object is a long way from the camera. In practice they are not necessary. I've tried to understand what makes the engine use a low poly model but can't - I think that at high graphics settings it just doesn't bother. These meshes are not necessary and can be removed. None of my models have them."

Never heard of 3DSMax people deleting those (I've looked over some 3DSMax tutorials hoping to get some pointers), but from what I know from using his stuff he's probably right, everything works without them and it probably saves me a lot of extra work and headache ignoring those.

"You do need the COLs - these objects are used to store the collision sphere info from the .mdb. Don't try and edit them."

Which raises the question, how to deal with them when I made a new mesh? Should I... somewhat... assign them to it? Should I, say, position the new model into the exact same postion as the old one so that, uuuh... those collisions keep working? I have no idea, these collisions confuse me, I only know I accidently deleted them way too often. 


"General points:
Always model in quads. This thread is useful:
http://blenderartists.org/forum/showthread.php?t=93651
Let the export script triangulate it for NWN2. Don't worry too much about poly counts, graphics cards are much faster than they were five years ago. Do try to remove unnecessary faces, have enough to get your meshes profiles looking smooth. Having too many faces near joints will look bad because the NWN2 skeletons don't have extra 'joint' bones to prevent the joint squashing (You'll see what I mean when we get to rigging proper)."

I almost missed that last sentence there, which might explain my problem with the Make Human model in the last post (armpits). So reducing the vertex count down below the arms could help if I understand right? Something to try. 

"The export script doesn't handle relative paths correctly - make sure you have specified your texture files with absolute paths. Although Blender can read .dds files it can't write them. Do the UV and texture last. Get the mesh right first."

Dunno what that absolute/relative paths is about. DDS thing is clear. Doing UV and texture next year as it seems anyway.... Hoping to get the mesh right until then.


Well, so far for this walkthrough... I hope Jester doesn't mind using his quotes here, but I think this serves well to illustrate my problems.

Learning 3D stuffs, part two: Getting started

Part 1 is below

Now to the part where things get really messy: Importing and starting to work in Blender.
Sadly this is probably where most misunderstandings occured in the past when people like Jester tried to give me some hints - the problem isn't really how to import or sticking to NWN2's specific conventions (well, once we get to exporting that's not quite true), but the main Blender workflow itself that most people who have experience in 3D apps take as given, like "then just paint the vertex weights..." - lolwut?

Well, let's start with the things I have covered already. Import.

Importing a NWN2 mdb works. I'm using Jester's nude as a base here because it comes with everything I need and armors can't be slimmer than that. Importing with the standard settings + "find amature" I end up with this:


Just for the record, I also managed to get textures in somewhere in the past and even on this import they show when rendered (F12), but that's another topic. So what I have is the main mesh and an amature to work with. The amature is actually not the NWN2 skeleton, only a replacer to give you an idea where what is. Posing this or making changes to it is no option if I understand correctly, you can only use it to make sure the mesh fits it as good as possible. So much for mdb files, let's hop over to Blender 2.49 and .nifs:


Again using the default settings for the nif imports, I'm ending up with a model that looks quite okay for now. Note: I'm only using this one for testing, I only plan to convert content I'm allowed to convert ;) ). But, if you compare the picture with the mdb import above, you should already see a difference - the pose. A comparison pic from an older post:


So the main problem with all the new models is getting them into the same pose as the NWN2 skeleton. And booooy, that's where the trouble starts. I'm not even talking about making it fit exactly already, only about... lowering the arms?
The .nif model for example comes with no skeleton... or rather, there's some sort of amature included which I can't quite figure out how to use. When I try to move/rotate/etc, I get....


So. And that model should fit the base human mesh from NWN2 some day? I don't see that coming... I assume I have to make a new amature, and paint new weights... which, frankly, is only sentences I have picked up while reading the webz, because, hell I have no idea how to start with that.

What I know so far from resources like the Blender Noob to Pro is basic manipulation, I know how to grab, move, add verex points, edges, faces and cut them off, I also can scale bones... but that's it, and learning even that is very hard in Blender because it's the damn most unintuitive thing ever. I'm no computer illiterate, I learned the toolset, Photoshop, whatever, but.... this? This is rocket science. Anyway, rant over... switching to Make human now because the problem there is similar and yet different...
In make Human I created a slim female figure I'd like to use as a new base (I know people start with easy things usually, but I'm not interested in creating a new barrel for NWN2, I want to work on what I really want! ;) ). The big problem is that you can't pose in Make Human, but you get support for that in Blender. I export using the usual settings and import it, scaled to 0.13 which is the closest I can get to the NWN2 model. I end up with this:


Not too shabby, isn't it? The problem is, even though it comes with a skeleton and already set up for posing, actually posing it is much harder than I thought. Some rotations are completely impossible, like turning the hand. I found it almost impossible to come even remotely close to the NWN2 mesh. Here's what made last night:


Left you see the NWN2 model, right the Make Human. Yes, I managed to lower the arms, but it looks already less natural than the NWN2 one, even though the mesh is of a much higher quality. Look at the hands, I can't get them into the same position (important later for gloves or bare hands). And I can see the exact same problem coming with any Bethesda models too, all of them, even if I could manage to pose them, would be very hard to pose in detail. Details like... the Make Human skeleton doesn't even have all the finger bones, just one for each finger where the NWN2 skeleton features every knuckle (you want to make a fist later to hold a weapon, yes?).
Another issue is the heavily deformed mesh once you start posing things in Bender. Take shoulder and armpits...


You don't even see it that much here anymore because the arm is too low, but if it's at say... 20 degrees more upwards the armpit looks ridiculously deformed. The shoulder already looks absolutely unnatural. This is the problem with posing in Blender. If you compare it to Jester's base (posed in DAZ), the result looks much better:


Pity the DAZ body isn't to my liking and you can't pose the Make Human one in DAZ... anyway, you might say "who cares for nude bodies", but the same problem will probably occur with .nif models too (if they were even posable in Blender), I'm not looking forward to it.

All this is still very basic stuff. I've not talked about cutting heads off yet etc, but I managed this. Where it really gets over my head is the posing for one, then the whole "rigging up to NWN2 skeleton" thing which is absolutely mindblowing for me. But as you can see, my problems already start long before that.

To be continued.

Learning 3D stuffs, part one: The setup

As I said in my last post, I'm always looking jealously over at the Bethesda community which seems to put out hundreds of new models every week with ease, a lot of them armors or body replacers of high quality. The NWN2 community started off with quite some enthusiasm years ago too, but seems to have died out when it comes to nice clothes etc. Unacceptable! So the only solution is, trying it myself. As long as it's just retexturing of existing models, no problem, I have figured that out myself, being familiar with Photoshop and having learned the basics of file conventions in NWN2. But where I'm completely lost is the 3D side of things, actually doing stuff in a 3D app.

As some sort of reply to, say, Jester's helpful mails last year, the few tutorials I've found and Frank's comment to my last post, let me start with where I'm coming from and where I really get stuck.

As for NWN2 works, what I did so far can be seen in that little hak linked on the right (I still don't get why I have that age restricted thingy there). That is based on Jester's New Nudes (with clothes), basically a collection of textures attempting to suit every race as good as possible.
Furthermore, not uploaded, there's my attempt to use Jester's belt-slot clothes to create some dresses and undies. Example:


What you see up there is actually not a painted body model, but the lingerie is a 2nd model worn as an extra piece of clothing above the main body, enabling you to use any body texture with it (a blue one for Genasi, a dark one for drow etc.). The lingerie model is a piece of clothing worn as a second layer in the belt slot (NPCs) or gloves slot (PCs), based on Jester's catsuit model with most parts transparent. All this can be done in Photoshop alone, along with the regular NWN2 tools like mdb cloner, nVidia plugins for Photoshop etc. etc. And of course existing models, which is the tough part.
The problem is that I'm stuck with the basic shapes of those models, so a, say, dress with puffy arms, certain skirts etc. are not possible. Also, to get a bit more into detail, my undies like that up there look incredibly 2D, like paper cutouts. You can fake some structures with normal maps, but usually the seams never look convincing. To add actual volume, you need a model and edit it in a 3D app.

Anyway, this just to sum up the following: I'm familiar with NWN2 content and naming conventions, know how to use mdb cloner, know the basics about texturing in 2D, can edit 2das etc. etc.

Now let's get into 3D, because this is where I feel like a 3 year old....

Starting with my setup. I've collected most tools needed to import, export and edit both .nif (Bethesda) and .mdb (NWN) files, plus some tutorials:


Missing in that pic are of course the NWN2 toolset, standard tools like mdb cloner, NWN2 Packer and stuff I use for other things too like Photoshop (Elements and CS5 on the Mac side). I also have Gimp in there for some specific functions - mostly to follow a Blender tutorial, but there's also neat things like a "make seamless" filter to quickly create texture tiles, which requires a bit more work in Photoshop.

Where things already get messy is the basic setup of Blender and it's plugins: Certain plugins ask for certain versions. That's why you see both Blender 2.49 and Blender 2.62 in the folder. Finding out the right combination was already one of the most frustrating parts:

- 2.49 is required for importing/exporting Bethesda's .nif files, because the niftools haven't been updated yet.

- 2.62 is for the rest, including the .mdb plugins which have been updated. I also prefer using this version, and the two look so different that it's almost like learning two different 3D programs at once. I prefer to go with the newer version and only use 2.49 to import a .nif and save it for using in 2.62 later. After all I don't plan to export a .nif again.

Having both versions introduces a new problem: You have to change the install paths to get them both running at the same time, otherwise 2.62 overwrites the 2.49 content.
Also, what barely anyone tells you, stick with the 32bit versions!!! It took me a long and frustrating time to find out the 64bit version will only result in much more headache when installing the plugins.

Now for the required plugins:

- Niftools: Install only exactly following this post - No experiments. A 64bit version or a different python download than linked there will screw everything up. Don't try the alphas for newer Blender versions, screws things up too. Stick with the regular downloads and Blender 2.49.
The only exception - you can (additionally) use the latest release candidate of Nifscope, only this will enable you to get Skyrim models into Blender (a different topic for later, haven't tried it yet).

- mdb plugin: Not half as much headache installing it than the niftools. Works with the latest Blender release, as long as you stick again to the 32bit version all is fine. Remember you have to enable plugins in the User Preferences -> Add Ons of Blender before you can use them.

Additionally, as I've read in many places, Bone Weight Copy should make things much easier. It was included in past versions of Blender, now you have to find it again on the interwebz. Funny, the name of the original author sounds somewhat familiar.... <_<

With all the Blender stuff covered, maybe a few words on the additional stuff in my folder.

First we have the DAZStudio, which was a free download during February. This is almost exclusively for making human bodies (or clothes) and posing it. I was quite excited to get it for free first, but I'm a bit less excited now. I don't really like it. I wanted to use it for making a new base model that looks a bit more natural than what's available currently, but hell, they even want you to BUY the nipples... hahaha... I used Poser a long time ago, which would be more useful for that task. The big pro argument for DAZ is that you can actually pose the figure, a topic I'll get to in my 2nd part.


As an alternative to the above, we have an Open Source app called Make Human. I'm using the latest Nightly Build because it comes with quite a few new features not available in the stable one yet, and it works fine.
For making a base body I'd actually prefer this program by far over DAZ. Because the body looks much more natural (based on full body scans), you can make very believable fat/anorexic/etc persons and, well, it's not a biggy, but you don't have to pay extra for nipples (etc) too.


One of the big Pros of this program is that it has a very smooth Blender export, Blender actually comes with a Makehuman plugin by default and you get a posable, rigged, neatly setup model from Make Human into Blender with just a few clicks. Theoretically, because there are issues I'll mention later. One of the real big issues in this program is that you CAN'T pose yet. This issue is so big it almost ruins things completely. You can pose in Blender, but.... later.

Well, so much for the basic setup. You can also see some documentations in my folder, some from tips from Jester, some Blender tutorials, release notes. Hexagon, Bryce etc. are of no importance for NWN2 now.

Finally, there's also gmax in there. I don't know much more about gmax other than it's free basic version of 3D Max, fairly old, but should have enough functionality for NWN2 modelling... I haven't looked much into it yet.

To be continued.